New Work Order Tab
New work orders are created in the “New Work Order” tab.
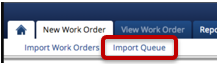
Clicking on the “New Work Order” tab will show the new work order data entry form. You can also hover over the tab to access the work order import sections.
There are three ways to import new Work Orders into PPW:
Manually
Import Work Orders by accessing the Client’s website
Import Queue which utilizes the Auto Import feature
Manually
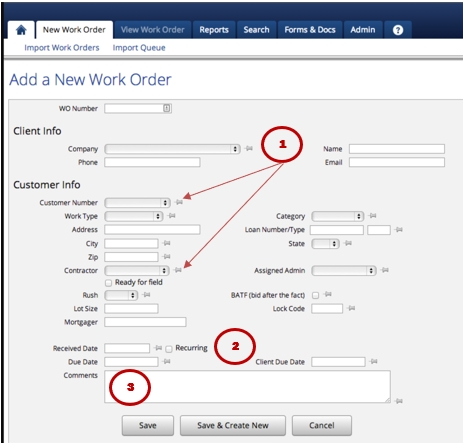
With the cursor placed over the New Work Order tab PPW will open a box highlighting the three option for entering new work orders. Clicking on New Work Order will open the screen for manually inputting a Work Order. The display is comprised of text boxes, some with pull down menus and some with a Push Pin Icon.
The Push Pin Icon will rotate and turn green if the information in the box is “Pinned.” If the WO is saved with information in a text box and a “Pinned” Push Pin Icon, the information will be saved and will auto-populate when the New Work Order tab is accessed.
a. The Admin can set up a no-charge access account for a client. This type of activity is discussed in the Admin section and normally applies to clients who have consistent low volume work to be performed.
The Manual entry of WOs also allows for the creation of recurring WOs. In order to create a recurring WO, left click on recurring in the left-hand portion of the WO and several options will appear. There will be options to enter the number of days, weeks or months for the WO to recur, an option for the number of times per month, and an ending date. Clicking on the End Date creates a calendar display for selection of the ending date.
Comments again can be “Pinned” and will recur.
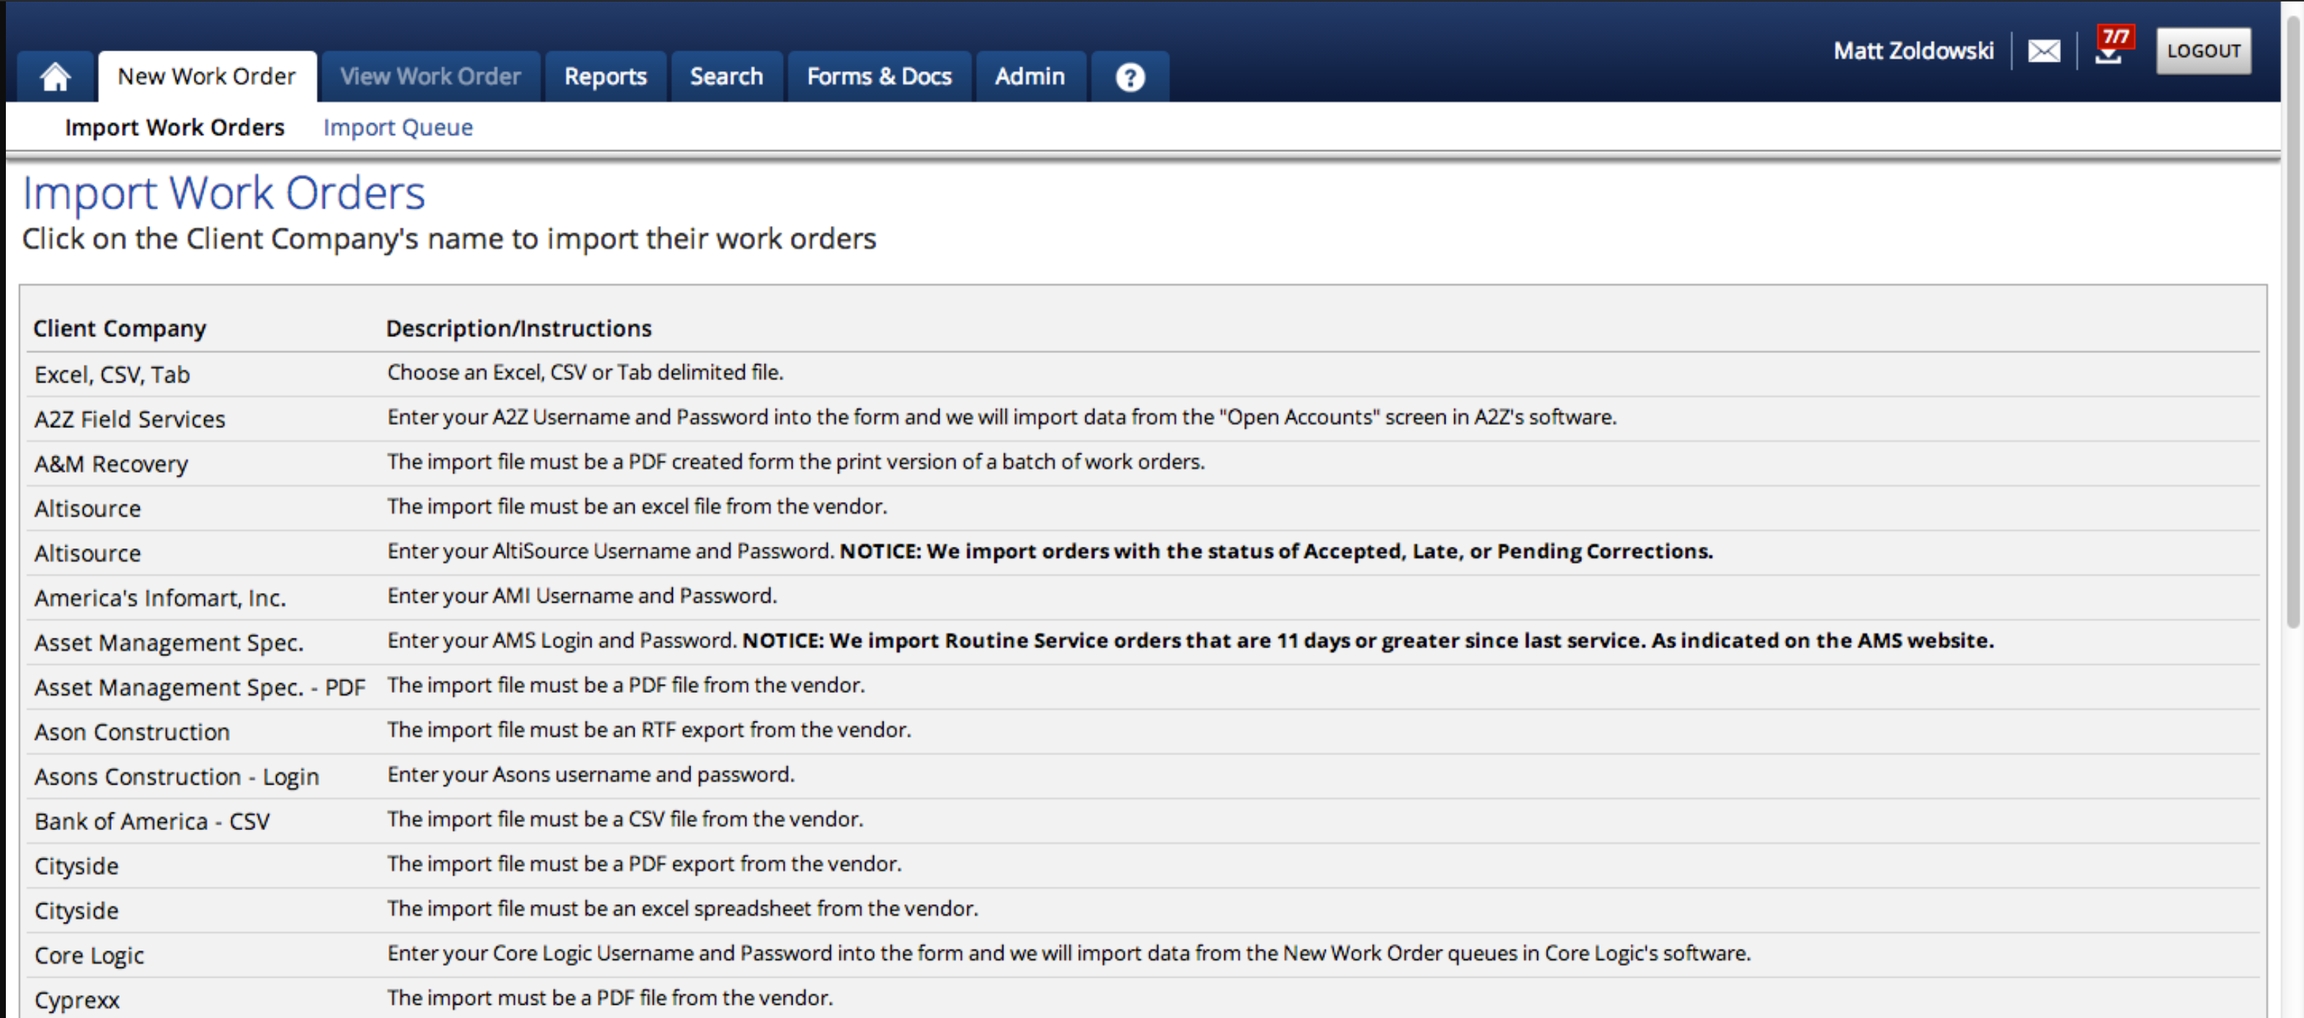
Import Work Orders
Importing work orders is the preferred method for creating new orders in PPW.
Work orders are imported using two different methods:
File based imports - These general use PDF files but other file types such as MS Excel and Word are also used.
Username & Password authentication - These imports require the client companies user credentials to pull work orders in directly from their website or online software application.
Import Queue
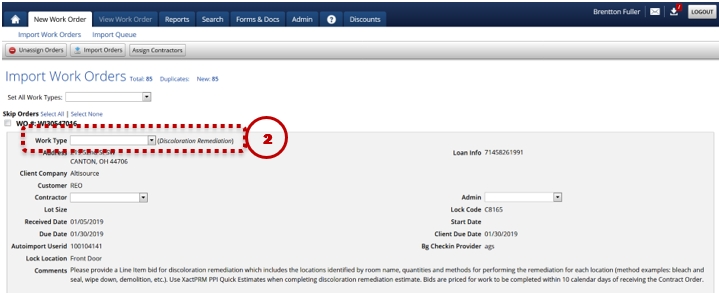
Left-click on 'Import Queue' and any orders that are ready for importing will be listed:
Imports that are ready will be listed. The first time importing from a client will require the setting of Work Types. The Client’s identification of the work type will be displayed next to the selection box, choose from the dropdown menu to identify & assign a Work Type Label. After the first time it is assigned, the system will auto assign the Work Type. If the Admin wants to change the designation, simply change it the next time it is imported.
Contractors and Admins may also be assigned on import. If auto-assign is used the system will make a recommendation but it can be overridden. If assigning previous contractors is active PPW will use this option to assign contractors before the zip code assignments. Select Import and the WOs will be added to the job queue. If Admin or Contractors are not assigned when importing, the WO Status will be Unassigned.
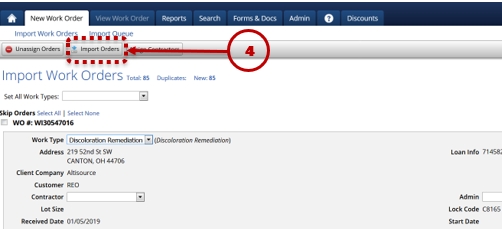
How to Import Orders
1. To begin auto importing work orders into the system so they show up on the home screen, you will want to click on the Process button.
2. Once on the processing screen, you can then associate to the clients work type in parentheses. If there is not client work type in parentheses, then the system cannot automatically associate that work type the next time it comes into the system. If there is a work type from the client, then the system will automatically populate the last work type you designated in the drop down menu.
3. To teach the system what that work type is and to get the work order to populate on the home screen, you will first want to click on the 'Select All' button.
This will select all the work orders on the screen by checking in the check box on the left hand side of the work order number. Any box that is checked in will be SKIPPED from importing onto the home screen. You will want to un-check the box of the work order that you designated the work type for.
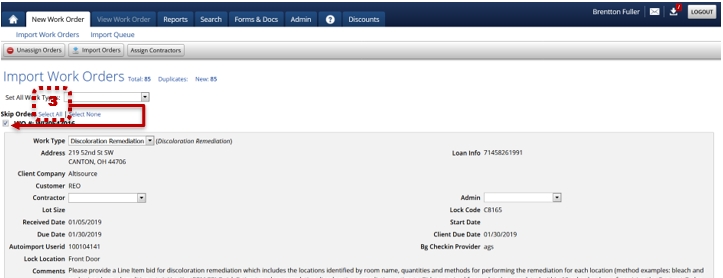
4. After you have unchecked the box, up at the top of the screen next to the un-assign orders button is a button that says 'Import Orders'. Click the button. That will import any work order that does not have a check box checked in. It will also teach the system what work types are so that the next time you go to that clients auto import, if there were a work order with that specific work type in parentheses, the system will automatically have the work type you designated in the drop down menu.
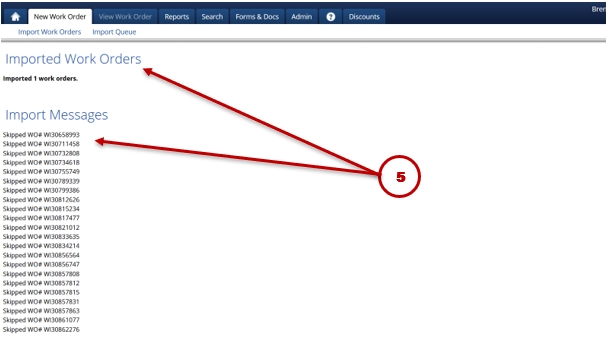
5. When you click on 'Import Orders', that will tell you how many work orders imported that will show up on the home screen, how many orders were skipped and will still be in the queue, and how many errors, if any, occurred.
Once the system has learned which PPW Work Types correspond to client work types, the system will match them automatically.
Last updated