Loading...
Loading...
Loading...
Loading...
Loading...
Loading...
Loading...
Loading...
Loading...
Loading...
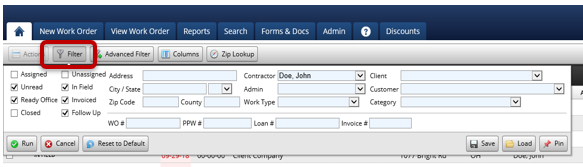
The Filter button will allow you to to filter the orders you want to display on your homepage.
The basic filters allow you to filter by:
Status
Address
City/State
Zip Code
County
Contractor
Admin
Work Type
Client
Customer
WO Number
PPW Number'Loan Number
Invoice Number
You can also save and load filters that you have selected. You can also select the pin option which will keep the filters on the home page. The reset to the default button will reset your filters back to their default settings.
The actions button will allow you to modify, delete, cancel and export work orders.
There are four types of actions you can perform on the home page:
● Status change
● Modify order
● Import/export
● Miscellaneous.
● The actions button will be gray and unavailable until a work order is selected. You can select a work order on the home screen by checking the box left of it. This will give you the option to modify the order using the actions button.
The status change options allow you to modify the status of a work order. You will be able to mark the order complete, assign and unassign contractors, send it to field, mark orders ready for office or acknowledge the order:
a. Acknowledge - This will change the order from an unread status to let others know you are aware of the order
b. Mark Ready for Office - This will allow you to mark orders ready for office one by one or in mass.
c. Mark Complete - With this action you will be able to close orders by marking them complete.
d. Assign Contractor - With this action you can select multiple orders and assign contractors to those orders.
e. Send to Field - This will allow you to send work orders to field when you’re ready for the contractor to perform the work as well as send the order to the mobile app. This action will not apply if the setting to (Automatically send new Work Orders to the assigned Contractor. If not checked then new Work Orders will only show in the contractor’s queue if Ready for Field is marked) is enabled.
f. Un-Assign Contractor - This will allow you to un-assign or reassign any contractor that is assigned to a work order.
The modify order actions will allow you to make changes and edit the work order from the home page:
a. Assign Admin - This action will allow you to assign an admin to oversee your work order.
b. Set Work Type- This action allows you to set your work types. For example, you will set a work order as a grass cut or winterization depending on the type of work the contractor will be performing.
c. Set Client Company - This action will allow you to select or change the client company to the work order.
d. Set Investor - This is a PPW premium package feature that will allow you to select or change the investor for your work order property.
e. Change Due Date - This will allow you to change the due date of your work orders.
f. Set Start Date - This action allows you to change and set a date you want your work orders to be started.
g. Set Client Due Date - This allows you to set and change the client due date. This can be used if there is an error or change in the client due date.
h. Update Recurring Work order - This setting is used for any work orders you have set to recur in PPW. It allows you to make updates to recurring orders such as changing how often they recur and the cutoff date.
i. Set Estimated Complete Date - This allow you to set an Estimated complete date for when you expect the order to be completed.
j. Add Job Note - This allows you to create both property notes and job notes from the home page.
k. Add Work Detail - This allows you to add a work detail to the work order item details in the general info section of your work orders.
l. Set Category- This allow you to move or set your work orders to categories you have created.
m. Set Background Check Provider - This allow you to set or change the background check provider for your work orders. All work orders require you to check in when using the mobile app. If the Background Check Provider is set to blank it will require a PPW check-in that will allow you to just press the check in button. The Aspen Grove solutions option will require the contractor to have an active and valid ABC number as well as the completion of the Aspen Grove checklist. The Servicelink requirement will require the contractor to have If your client requires a valid and active ABC number as well as the completion of the Servicelink checklist. Please note that some clients require a specific check-in. PPW will not be responsible for any fees are penalties as a results of the background check provider being changed.
n. Re-Calculate PCR’s - This feature will allow you to recalculate your PCR forms. For example, if you have created a new PCR form that is filtered to enter work orders that have already been created or imported this will add the PCR form.
o. Cancel Work order - This will allow you to cancel work orders in PPW. This will change the status of the work order and will only show the order if the closed filter is selected.
p. Delete work orders - This will allow you to delete work orders from the home page. To delete multiple orders, you must first have the group permission enabled. Please note that if you delete the order there will be no way for you to recover the order on your end. If you contact PPW support, we will be able to restore the order for you.
q. Set Invoice Complete- This will allow you to mark the invoice for work orders complete.
r. Alter Invoice- This is a PPW Premium package feature that allows you to alter invoice of work orders from the Home Screen.
a. Print WO form - This feature will allow you to view a PDF print out of your work orders
b. Print Client Invoice - This will to view a PDF print out of the client invoice you can send to your clients
c. Export to Excel - With this feature you will be able to print an excel spreadsheet of the orders you select on the home page. The columns will be determined by the columns you currently have selected on your home page.
d. Download Photos - This will allow you download photos from your work orders.
e. Send Results - Used to send results back to client via import/export.
f. Send Results by Email - Used to email a PDF package of results to the client for one or multiple orders.
a. Route - This feature will create a route for your work orders when working on multiple properties is required. Check the boxes for the work orders you wish to create a route for, once this is done you will click this option from the actions menu. You will then get a popup displaying a start and end address as well as all the addresses for the work orders you selected. Now click and drag the work order addresses to the order you desire using the 3 dots to the left of the work order address. Once the addresses are in the desired order you can click the create route button at the bottom of the popup window and it will pull the directions for the route. Once this is complete you can also use the print button to print the directions. Simply close out of the popup window to leave the route.
The Home page of PPW is the first page you will see when logging into PPW.
Here you will be able to see the work orders and information about those work orders. You will also be able to set exactly which orders display on the home screen along with what information about them does display. You will be able to manage those orders in mass. You can always return to the Home page by clicking on the "House" tab.
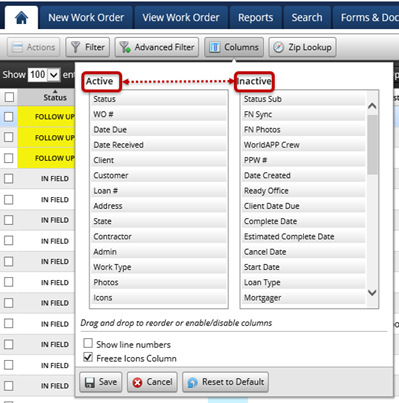
The columns button will allow you to select and display what columns you want on the Home screen.
By dragging one of the columns from the Inactive section to the Active section will place that column on the home screen in the order selected. For example, if you select the column ‘work order’ then ‘address’ and ‘zip code’ the orders will display in that order on the home page.
Status
WO#
Date Due
Date Received
Client
Customer
Loan#
Address
City
State
Zip
Contractor
Admin
Work Type
Photos
Icons
Status Sub
FN Sync
FN Photos
WorldAPP Crew
PPW #
Date Created
Ready for Office
Client Date Due
Complete Date
Estimated Complete Date
Cancel Date
Start Date
Loan Type
Mortgagor
County
Lot Size
Lock Code
Category
Invoice #
Invoice Date
Item Details
Client Invoice Payment
Client Invoice Total
Client paid
Cont. Invoice Payment
Cont Invoice Total
Cont Invoice Paid
Last Cut Date
Next Date
BC Provider
Mobile Check In
Import ID
Property Frozen
Conveyance Date
First Time Vacant
Routing Date
Deed Recorded Date
Property Lock Code
There are 3 columns that are permanently on the home page and those are:
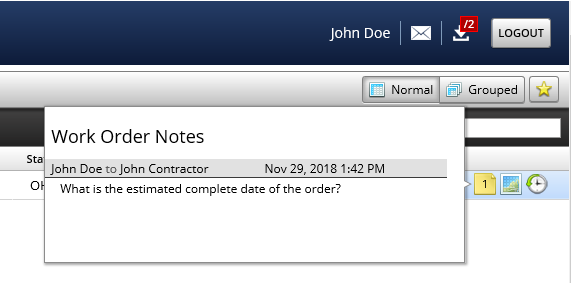
When you hover over the job notes icon, it will display the job notes and property notes for this order:
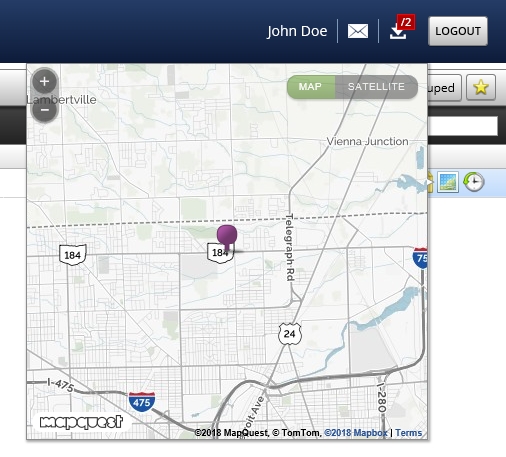
When you hover over the map icon, it will display the location of the address on an order:
When you hover over the clock icon, it will display the past orders for this address:
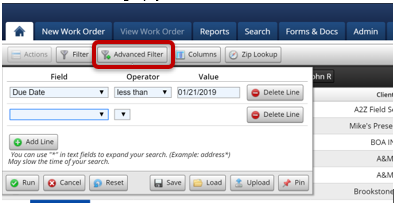
The Advanced Filter tab will allow you to set a more refined search for the orders on your homepage.
You will be able to add a line with several field options such as client totals, contractor totals, work order and address and much more. You will also be able to save the filters you have selected and load them later. The upload button can upload excel or csv files to bring up your work orders.
WO Status
WO#
PPW#
Client
Customer
Loan#
Report_id
Loan Type
Mortgagor
Work Type
Contractor
Admin
Category
Address
City
State
Zip
County
Create Date
Received Date
Accepted/Rejected Date
Photo Date Stamp
Due Date
Client Due Date
Complete Date
Ready for Office Date
Invoice Date
Client Invoice Total
Client Invoice Payment
Client Invoice Paid
Cont Invoice Total
Cont Invoice Payment
Cont Invoice Paid
Recurring - Next Date Property Frozen
When adding a field to your advanced filter that is a Date Field, you have the following options:
1. Operator – select from:
a. Previous
b. Next
c. Current
d. Before
e. After
f. On
g. Between
2. Value – a free type numeric field
3. A variable field, where applicable, to select:
a. Days
b. Weeks
c. Months
d. Years
When saving a Basic or Advanced filter, it will also save only the columns you wished to display as well as how you had the records sorted.
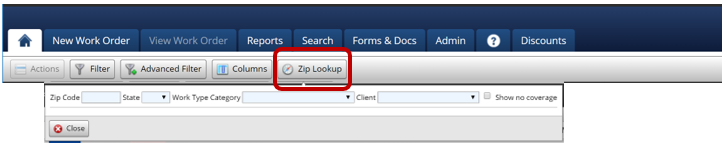
The zip code lookup button works with the auto-assign by zip code feature.
This button will allow you to perform a search by zip code to see which contractors have coverage over the area. The state filter will show all zip codes for that state. Select a Work Type Category to narrow your results.
The Search Within text box will allow you to Search the orders that are displaying on the home screen for any criteria.
For example, if you wanted to see only the orders on ‘Alexis Rd’ all you would have to do is type in ‘Alexis’ in the Search Within text box and orders for ‘Alexis Rd’ would show.
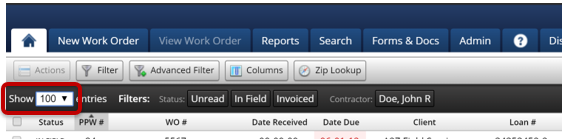
The show entries option will allow you to set how many orders Display on the home screen at once:
The options you may choose are:
25
50
100
250
500
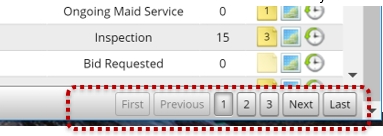
For example, you have PPW set to show 50 entries at one time, but you have a total of 55 orders that match your filters, then you may need to navigate to another page to see all the orders you are looking for. If this is the case, there are multiple ways to do this. In the bottom right-hand corner of the window you will see a few different options:
First: If you are not on the first page, you will be able to click this button and it will take you to the first page of orders.
Previous: Upon clicking this button you will be taken back one page.
Page Number: Clicking a page number will take you straight to the page you clicked.
Next: This will take you to the next page of orders.
Last: This will take you to the very last page.
This feature allows you to group work orders in clusters/groups to see a quick summary total.
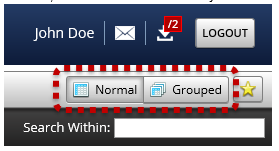
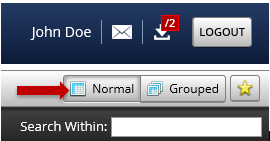
In PPW, there are two (2) different ways to view the Home Screen, Normal and Grouped. the Normal view is the default view of PPW.
To switch to Grouped, click on the ‘Grouped’ button which is beneath the log out button.
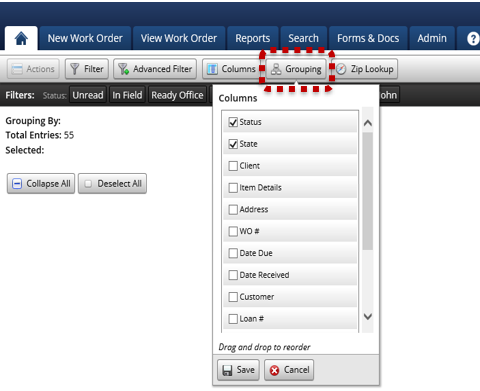
If you have never used the Grouped view before, you will need to do a little set up, after clicking on ‘Grouped’ this is the page you will see:
To start using this view, you will want to click on the button labeled ‘Grouping’ and select how you want the orders to be grouped:
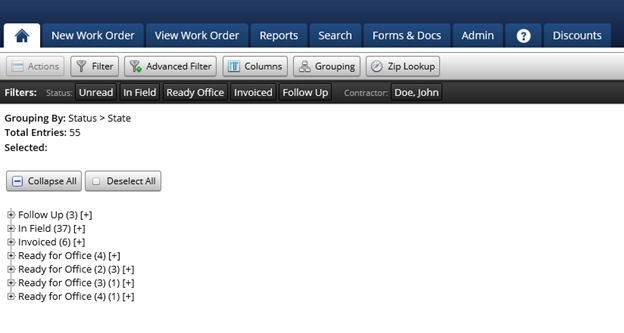
After you click 'Save", the page will refresh and will display as follows:
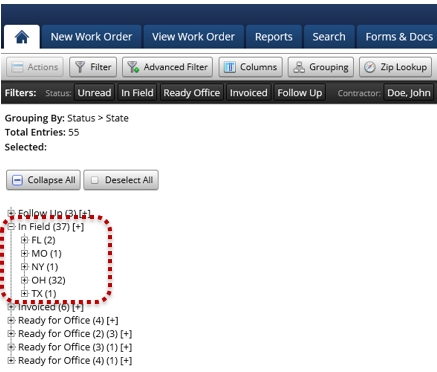
If you were to click the "+" button next to one of the statuses displayed, you will then see the list of States where those work orders are located:
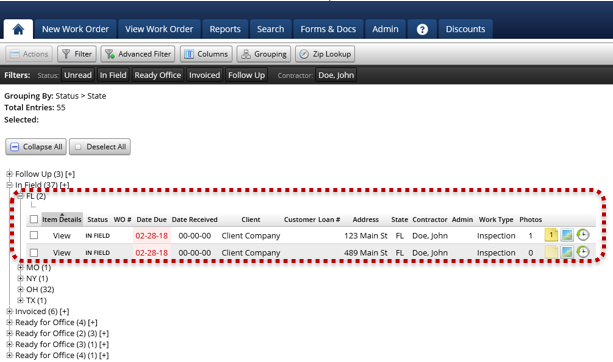
If you click the "+" button next to one of the States listed, we then see the work orders themselves:
To go back to Normal view, simply click the 'Normal' button:
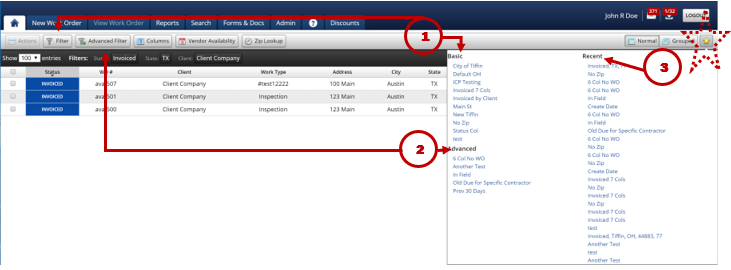
This button allows for access to all of your saved filters.
Clicking the 'Star' button will see the following:
1. ‘Basic’ Section – a list of any SAVED searches using the standard Filter.
2. ‘Advanced’ Section – a list of any SAVED searches using the Advanced Filter.
3. ‘Recent’ Section – a list of previous searches that were NOT saved.