Check Out
We are looking to provide a method to assist users in tracking the amount of time spent at a property for any given work order.
Please Note:
This is a PPW Check-in function and not associated with AGS or other check-in options.
This option will not show until the vendor has checked into the property.
User can sync the order without check out but cannot mark as Ready For Office (RFO) if set as required.
Feature can be set to:
o A specific Client Company
o A specific User
o A specific Work Type
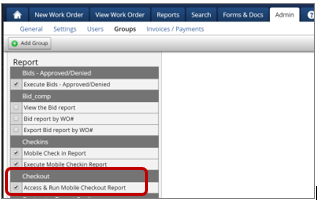
Group Permissions
In order to utilize this feature, the following permissions must be enabled:
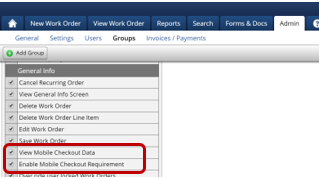
Enable Mobile Check Out Requirement – this makes the group required to complete the check out process before marking an order RFO. This must be enabled for your Contractor group in order for the functionality to be available to them.
View Mobile Check Out Data (all locations) - this will allow the group to see all check out information on the work order General Info screen as well as the Home Screen.
Access & Run Check-in/Check-out Report – this will allow the group to run the new report.
Client Company Requirement
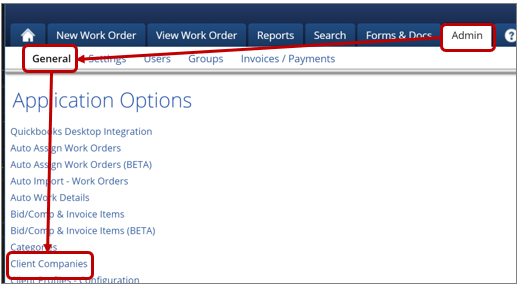
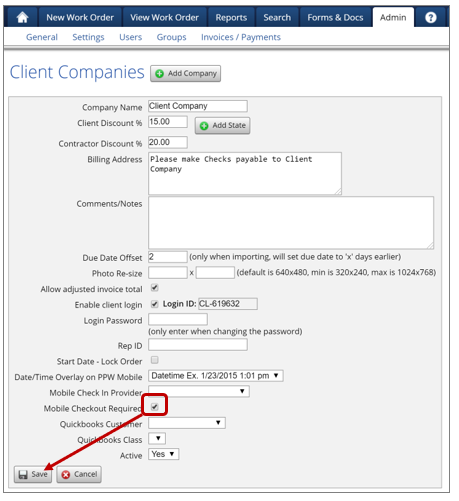
To set the Check Out procedure as required for a specific client company, Go To Admin->General->Client Companies and either click the “Add Company” button or select a specific Client Company already created.
To set for a specific Client Company, check the “Mobile Check Out Required” box and then click save:
User Requirement
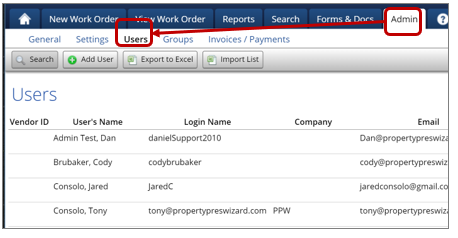
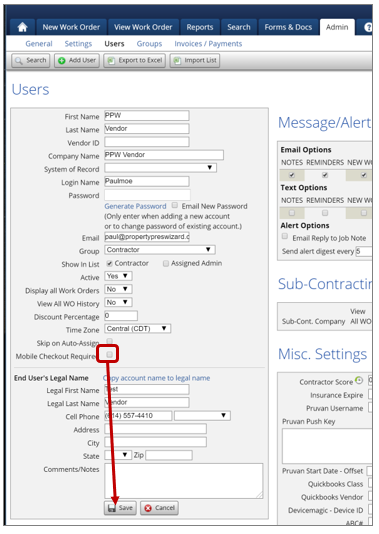
To set the Check Out procedure as required for a specific User, Go To Admin->Users and either click the “Add User” button or select a specific User already created.
To set for a specific User, check the “Mobile Check Out Required” box and then click save:
Work Type Requirement
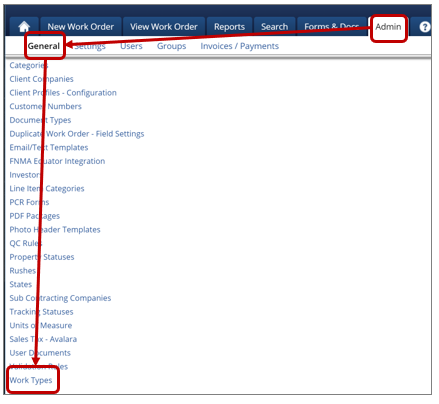
To set the Check Out procedure as required for a specific Work Type, Go To Admin->General->Work Types.
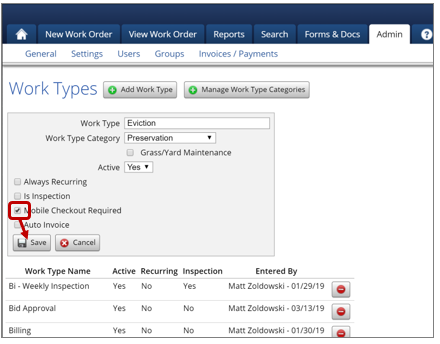
Choose either to click the “Add Work Type” button or select a specific Work Type already created. To set for a specific Work Type, check the “Mobile Check Out Required” box and then click save:
Mobile App Display & Functionality
Once the mobile user checks into the property:
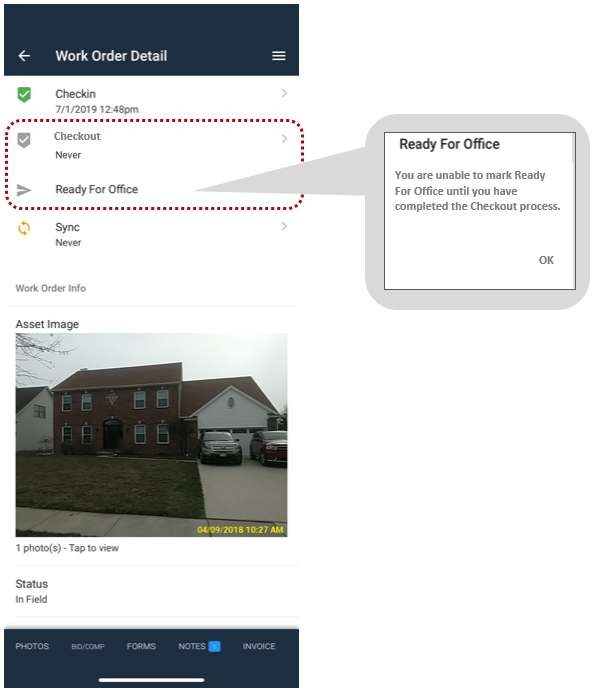
The ‘Checkout’ option will appear.
If the user has not checked out once they are ready to leave the property, the user will not be able to mark the order ‘Ready For Office’.
User will receive a warning message reminding them to check out first.
Both Check In AND Check Out data will real time sync versus waiting until the Sync function is used.
General Info Screen Display
In order to track both the check in and check out data, We have added the following to the General Info screen of the work order:
Section will also calculate the time from the most recent check in until the time of check out.
All occurrences will be recorded.
Clicking on the information icon will provide you with more detail for each action.
Section will also display a Total Time Spent at property. This is a totaling of each occurrence of check in and check out.
Total Time Spent will be rounded to the nearest 0.125 (roughly 7.5 minutes).
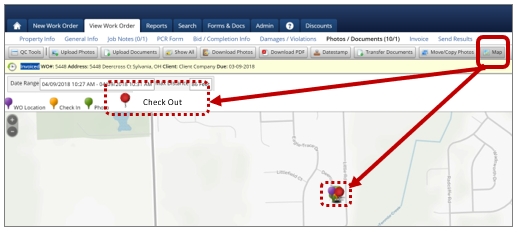
Map Pinning
Just as we do for check-in, we also added a demarcation pin indicating where the Check Out was completed. This can be located on the Map on the Photos/Documents tab of each work order.
Home Screen Column
We have added a new column option to the Home Screen called ‘Total Time’. This will display the total time spent at the property on that work order. It will be the same number as what is displayed on the General Info screen.
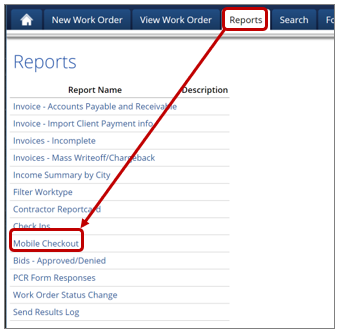
Reports Tab Addition
You also have the ability to run a report to more effectively review the Checkout data.
Building The Report
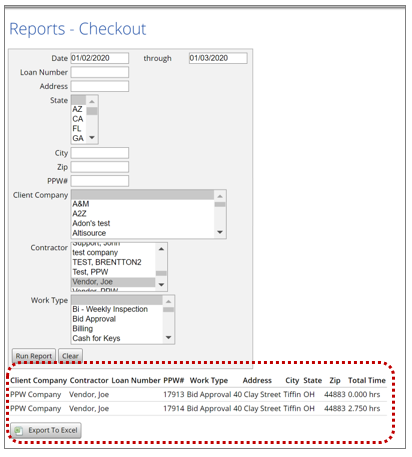
The user would utilize the following criteria to run the report:
Date Range – both a starting and ending date are required. Limited to a 30-day period.
Loan Number – be able to enter a specific loan number and get all total time for each work order.
Address, City, State, Zip – Would need a box to enter each.
PPW # – be able to enter a specific order number and get all data for that order only.
Client Company – choose a specific client company, from a dropdown list of all client companies, to display all work order total time.
Contractor – choose a specific contractor, from a dropdown list of all contractors, to display all work order total time data for orders they completed.
Work Type – choose a specific work type, from a dropdown of all available work types, to display total time for each work order of that type.
PLEASE NOTE: All variations of this report will be limited to a 30-day date range.
Report Contents
Once the appropriate criteria have been selected and the “Run Report” button clicked, it will display on the screen AND have a button to allow for Export to MS Excel.
Last updated